The following guide has been created by Stoneleigh Consultancy Limited to help your school administer and make the most out of your Aruba Central Wireless.
Registration
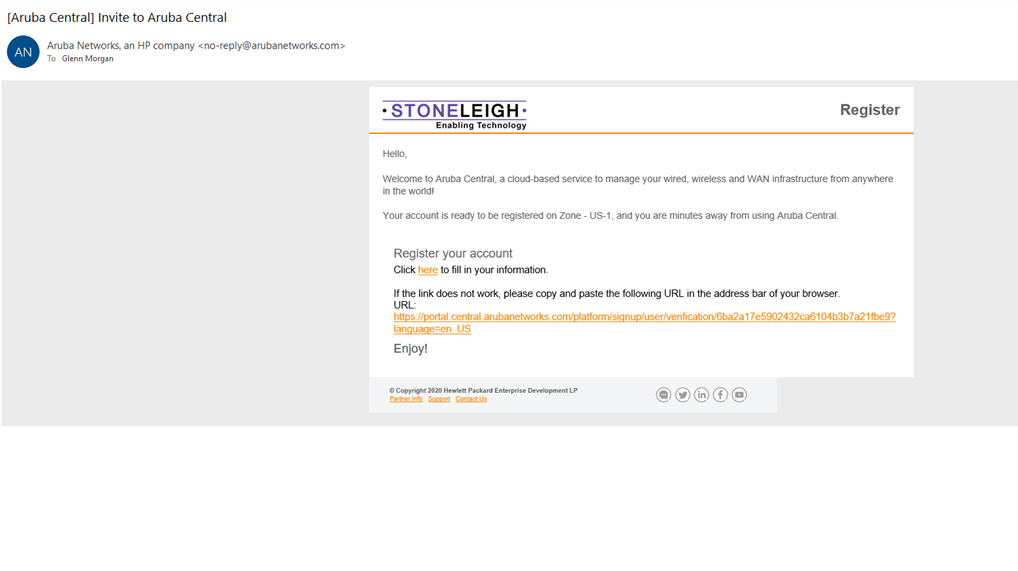
After your new Aruba wireless has been installed by your Stoneleigh Consultancy technician, an email will be sent out to a designated administrator of Aruba Central wireless at your school. This email will allow you the school wireless administrator to register your account enabling you to access and manage the Aruba Central platform anywhere in the world using cloud-based services.
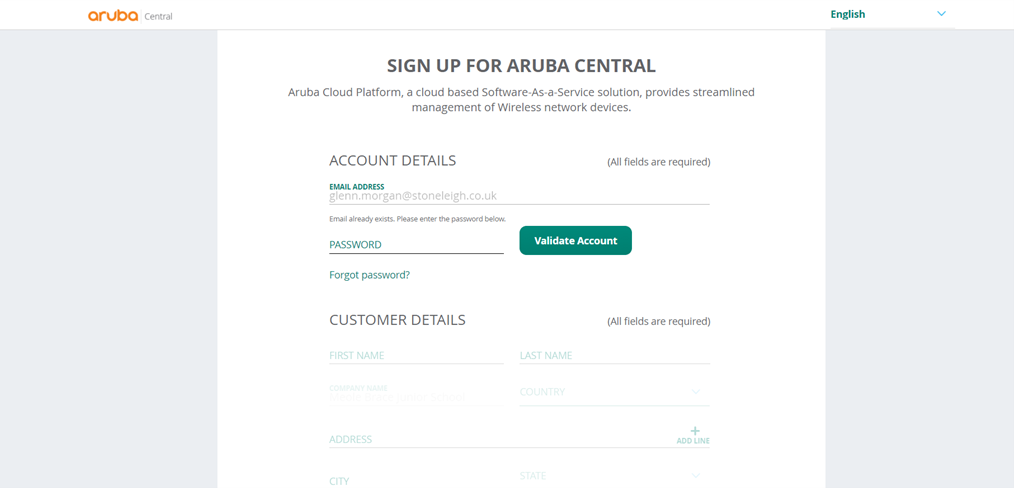
Sign up for registration is quick and easy with only a few fields to fill in as shown below.
School Administrator Logon
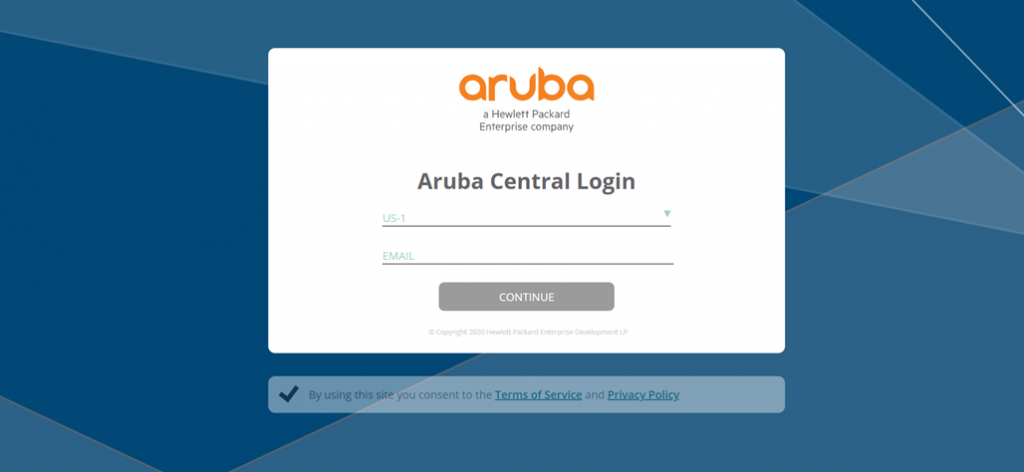
When you have registered your account, using the below link you will be able to access and manage the Aruba Central Cloud based services. Please ensure that US-1 is selected as shown below followed by your registered email address.
https://portal.central.arubanetworks.com/platform/login/user
Adding a Guest
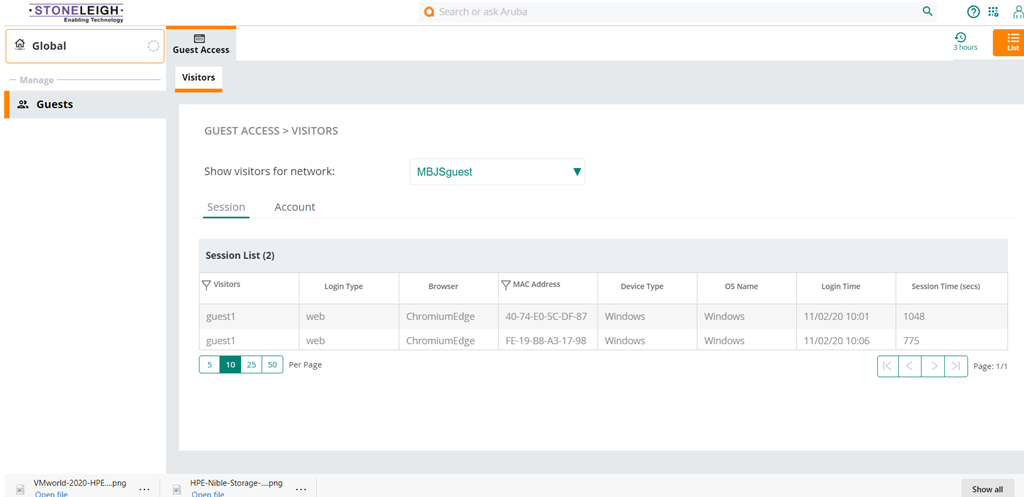
New Guest Access users can be created and managed from within the cloud-based services under the Account tab. Navigate to Manage>Guests>Visitors.
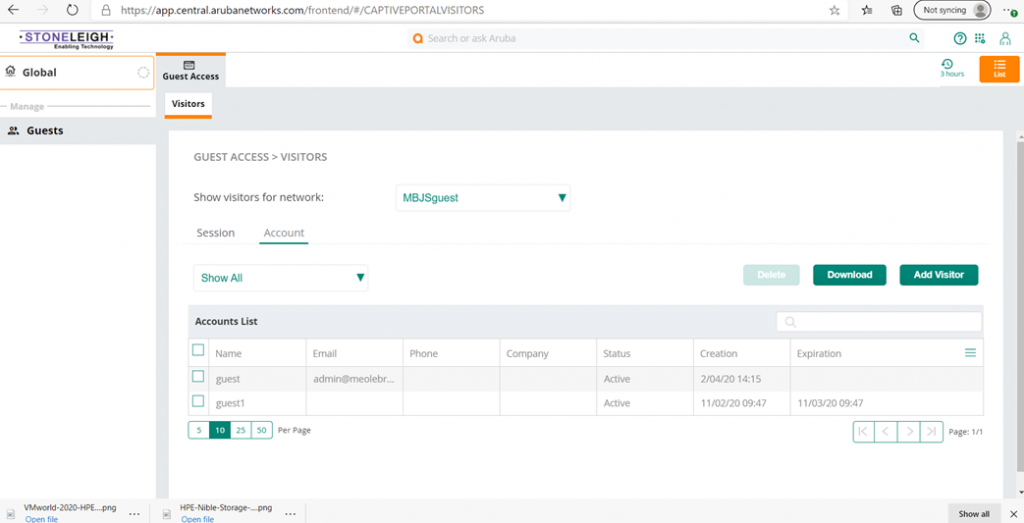
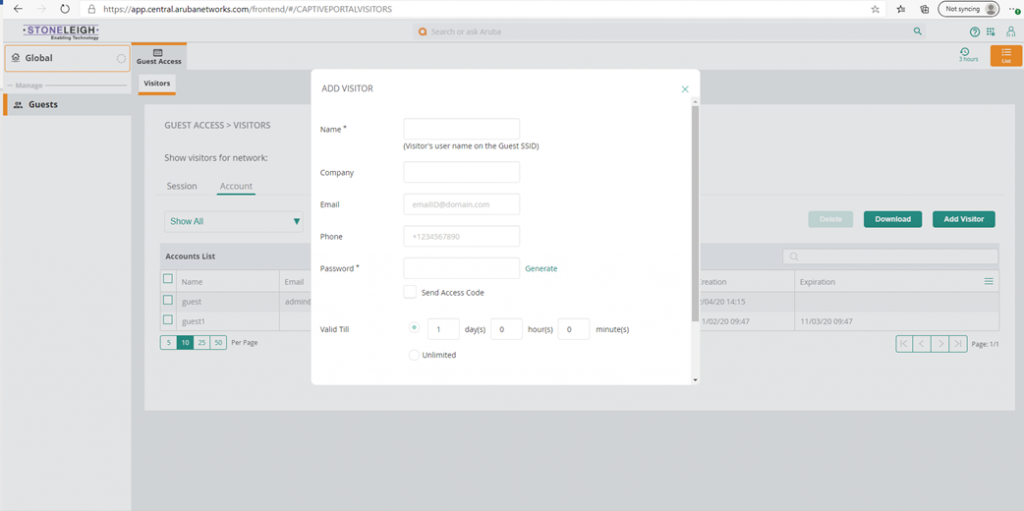
When adding a new user under the account tab select Add Visitor and fill in the required details of the user.
To add a new visitor:
- From the MSP view, drill down to a customer account.
- In the Network Operations app, navigate to Manage > Guests > Visitors.
The Guest Access > Visitors page is displayed.
- Click on the Account tab, and then click Add Visitor.
The Add Visitor pane is displayed.
- Configure the parameters described in the following table:
| Table 1: Adding Visitors | |
| Data Pane Content | Description |
| Name | Enter a unique name to identify the visitor. |
| Company | Enter the company name of the visitor. |
| Enter the email ID of the visitor. | |
| Phone | Enter the phone number of the visitor. |
| Password | Click Generate. The automatically generated password is displayed in the PASSWORD text box. Select Send Access Code to send the access code by email or SMS. |
| Valid Till | Specify the duration for the visitor account to expire in Day(S): Hour(s): Minute(s) format. To allow users to access the network for unlimited period of time, select Unlimited. |
| Enable | Select this check box to activate the user account. |
To view the guest or visitor sessions:
The Guest Access > Visitors page is displayed.
The following table displays the session details of the visitor:
| Table 2: Visitor Sessions Pane | |
| Data Pane Content | Description |
| Visitors | Displays the name of the visitor. |
| Login Type | Displays the login type of the client (Anonymous, Username/Password, Self-Registration, Facebook Wi-Fi). |
| Browser | Displays the type of browser that the client is connected. |
| MAC Address | Displays the MAC address of the connected client device. |
| Device Type | Displays the type of the device. |
| OS Name | Displays the OS on the client device. |
| Login Time | Displays the login time of the client. |
| Session Time (Secs) | Displays the duration for which the client is connected. |
The following table displays the account details of a visitor:
| Table 3: Visitor Accounts Pane | |
| Data Pane Content | Description |
| Name | Displays the name of the visitor. |
| Displays the email ID of the visitor. | |
| Phone | Displays the contact number of the visitor. |
| Company | Displays the company name of the visitor. |
| Status | Indicates if the user account is in active or inactive state. |
| Creation | Displays the date and time on which the visitor account is created. |
| Expiration | Displays the date and time on which the visitor account expired. |
| Actions | Allows you to edit a specific visitor account. |
You can filter the visitors displayed in the Account List by visitor status. Select Active, Inactive, or Show All from the drop-down list.
Deleting Visitors
To delete one or more visitors:
- Select the visitor or visitors you want to delete using the Multiselect box option.
- Click Delete. The selected visitors get deleted.
Downloading Visitor Account Details
To download the visitor account details:
- Click Download to download the visitor account details available in the Accounts tab.
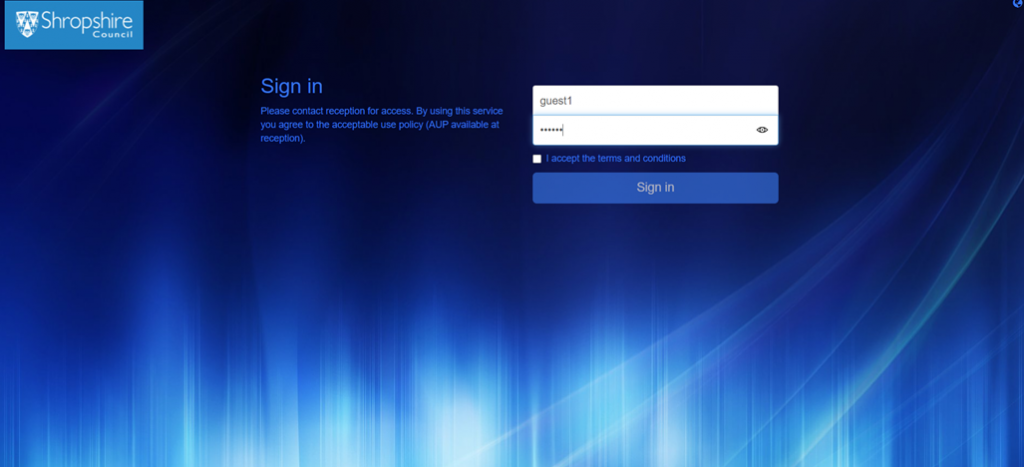
Guest User Logon
Once a Guest (Visitor) user account has been created the Guest user is now ready to logon.
- Step 1: Select the appropriate Guest user Wi-Fi network.
- Step 2: Once connected to the Guest network a browser will open with the logon page as shown below. If a browser does not open, select a browser manually and again the below logon page will appear.
- Step 3: Sign in using the Guest username and password supplied by the school network administrator.
Once you are signed onto the Guest Wireless network successfully a home page / welcome page will appear as shown in example below.